How to Improve Backlit Images
I’ve talked before about how important it is for a bird photographer have the sun at their back. Imagine yourself standing and holding your arms out wide like you’re expecting a great big hug from one of your kids/grandkids – each arm would be about 60º off of dead center, or open a total of 120º. When the sun is behind you and the camera is aimed at a bird somewhere within that 120º arc, the bird will be fully illuminated and your images will not be backlit. Conversely, if a bird is anywhere outside of that 120º arc (the remaining 240º) the bird will be backlit on some or all of its body. In other words, in two-thirds of the area birds can be found their images will be backlit. The logical thing to do if the bird is backlit is to walk around it until the sun is at your back, but realistically this often isn’t possible. So sometimes we end up taking pictures of birds that are backlit.
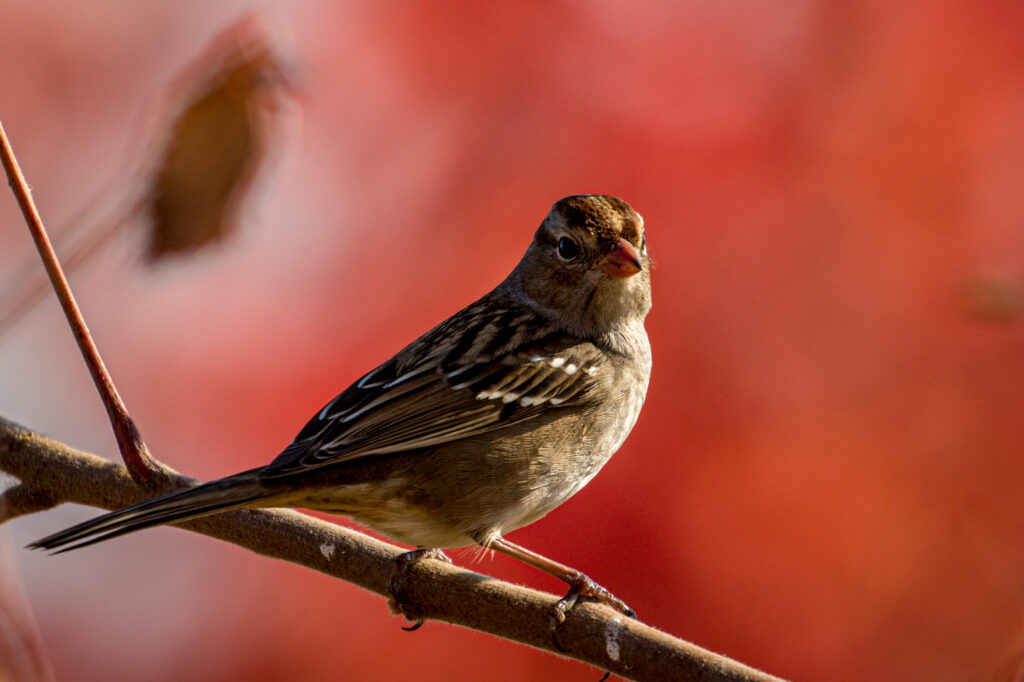
Below is a picture of a backlit White-crowned Sparrow. Note how the head and body are in shadows.
I loved the red background, which was caused by the autumn leaves in the background, so I wanted to see if I could improve the image during post-processing. I use Lightroom Classic for post-processing but there a lots of other programs out there that do the same edits (I do some on my iPhone within Photos).
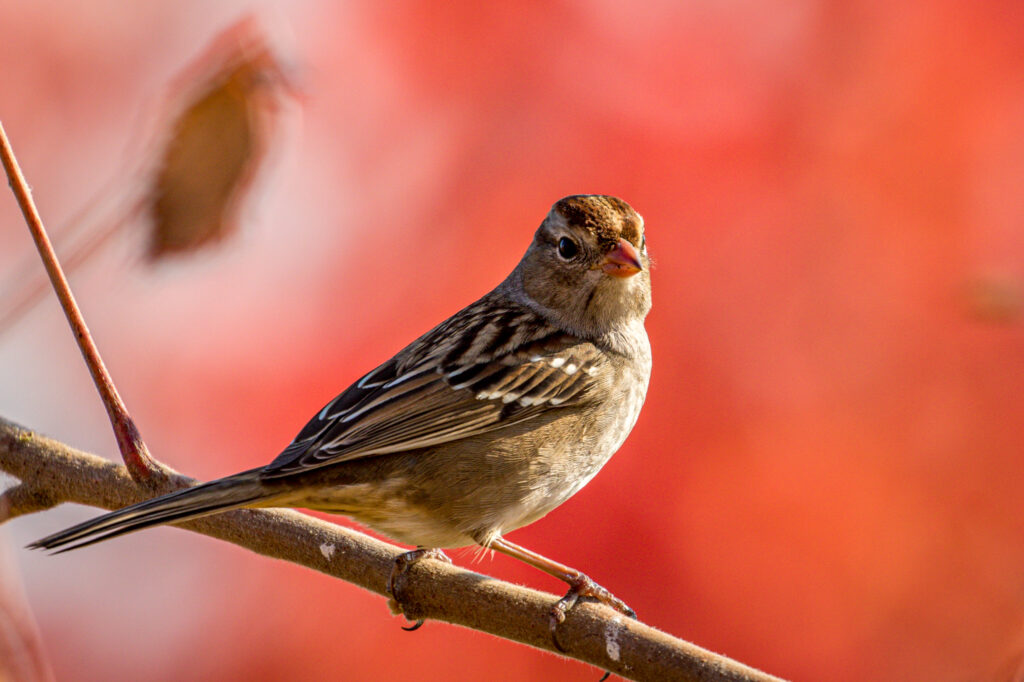
I changed four settings in the Develop mode to reduce the effect of the backlighting: Shadow, Exposure, Contrast, and Highlights and here’s the resulting image:
Not great, but better than the original. How did I get there? The first setting I change in backlit situations is Shadow, which is designed to lighten areas in shadows. One side-effect of reducing the shadows is it’s applied to the whole image and in this case it caused the breast of the bird to lighten to the point where it was burned out (so bright there was no detail). The adjustment for that is to reduce the Highlights setting, which takes bright areas and makes them duller.
As a result of changing the Shadow slider sometimes the whole image is no longer properly exposed – increasing the Shadow lightens the entire image. I then adjust the Exposure slider to make the image a little darker.
Finally, I adjust the Contrast slider to decrease the difference between the bright side of the bird and the backlit side of the bird.
Using the Shadow, Highlights, Exposure and Contrast sliders can improve a backlit photo, but can’t fully recover the parts of the bird in shadow. Experiment with these four adjustments on your backlit photos and let me know if you use any other methods to correct for backlit shots.
Click Here if you would like to learn more about GreatBirdPics. Membership is free; members can post their own great bird pics, create an online gallery of their works, and receive emails about bird photography and birding.


That is really cool!