How To Adjust Backlit Bird Photographs
Lighting is critical in our attempts to take GreatBirdPics. Out in the field we can’t easily control where the birds are in relationship to the sun, where they are in relationship to the sky, or what kind of sky is behind them. There are three primary causes of a subject to be backlit. The most common is when the bird is between you and the sun and the sun is shining on the parts of the bird facing away from the camera, casting the areas facing the camera in shadow. Secondly, if a bird is perched high in a tree the light of the sky can overpower the camera’s exposure calculations, resulting in a dark image of the bird. Finally, the type of sky behind a bird up in a tree can affect the amount of exposure – a beautiful blue sky may be the perfect contrast to the bird, but a cloudy white sky will wash out the features of the bird. There are two ways to compensate for a bright background: exposure compensation and using your photo editor. I’ve given several examples about using exposure compensation in the past so today I will provide some guidance on how to use your photo editor to compensate for a backlit bird.
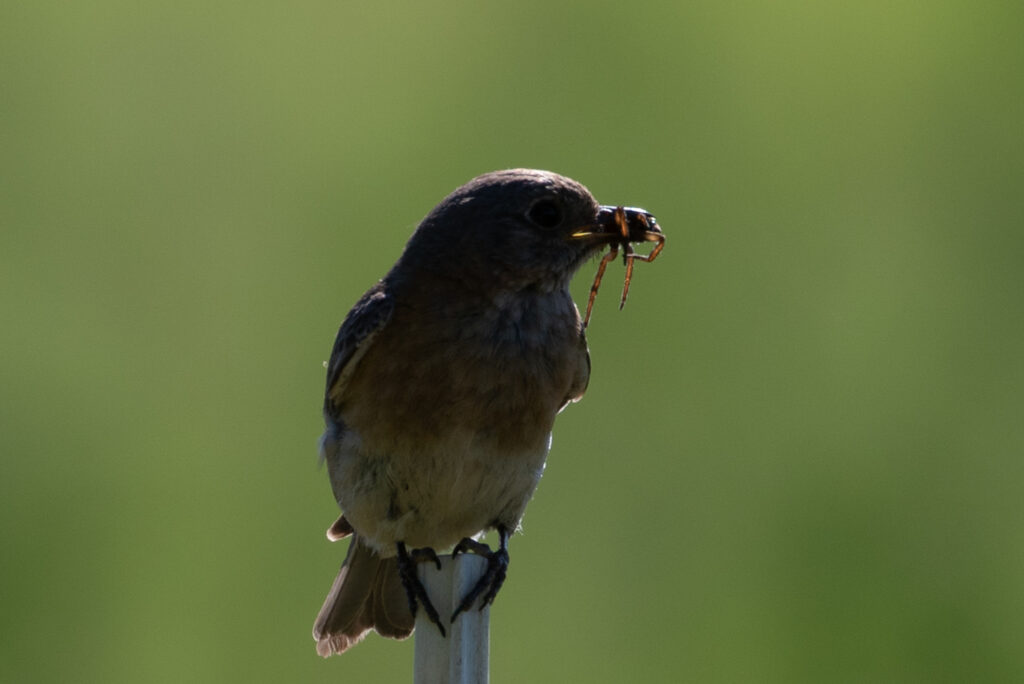
In our first example below an Eastern Bluebird has caught a bug but was posing on a fencepost with the sun behind it. There is very little of the bird facing the camera that is illuminated – the whole bird is in shadow.

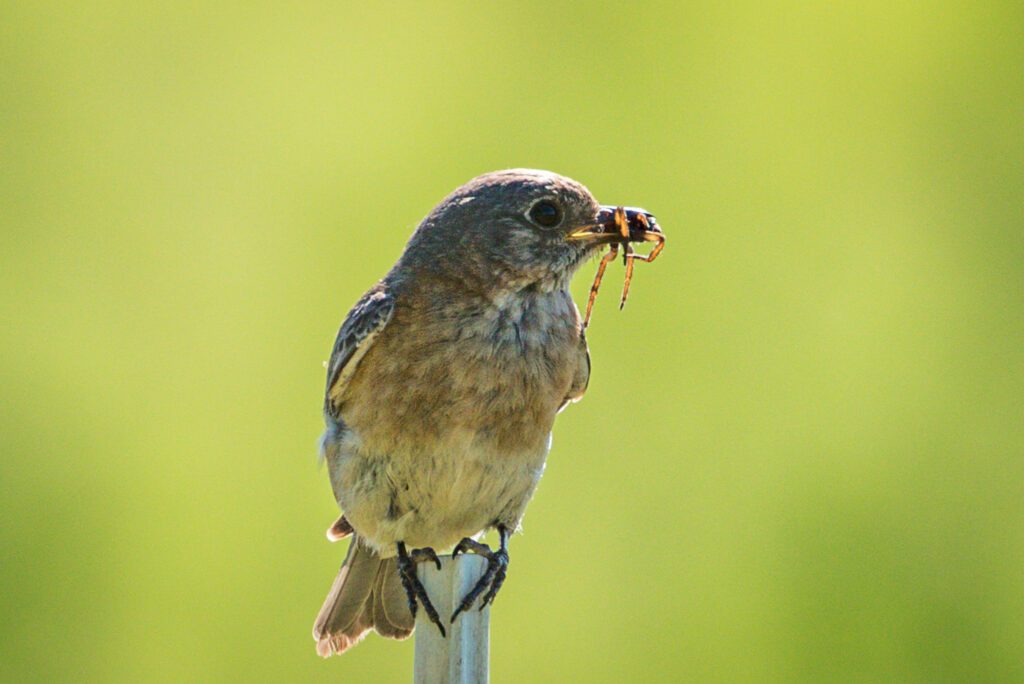
Even so, I liked the bug in its beak so I used my photo editor to see if I could extract a usable picture. I use (and love) Lightroom but every photo editor will have these same adjustments – even the photo editor that comes with your smartphone. The most important adjustment is Shadows. By increasing the Shadows adjustment, the photo editor lightens everything in the light range of typical shadows. For the picture above I increased the Shadows in Lightroom to 100 (although it’s not always necessary to push it up all the way). Then I adjusted the Contrast slider to improve the difference between the lightest and darkest areas in the photo. Finally I often have to increase the Exposure slider because the Shadows and Contrast adjustments often darken the overall pic. Here’s my finished product after adjusting the Shadows, Contrast, and Exposure:
It’s not ideal, but it’s a vast improvement over the unusable original.
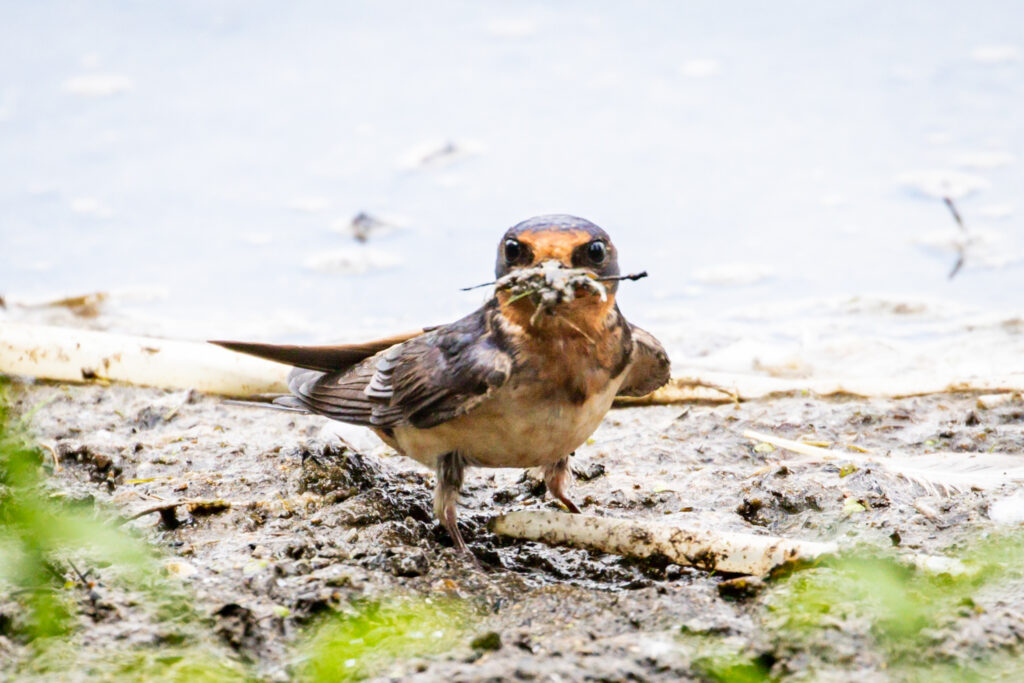
There is one other adjustment I occasionally use – Whites. My phone’s photo editor doesn’t have this adjustment, but any stand-alone editor will. Sometimes the sky is washed out – appearing almost white, or the water the bird sits on reflects mostly white. In some cases, by reducing the amount of white in the photo the blue in the sky or water becomes more prominent. Take the case of the Barn Swallow gathering mud for its nest below. The water behind it reflects a white sky. This caused the bird to be backlit. I adjusted the Shadows, Contrast and Exposure settings and ended up with this:

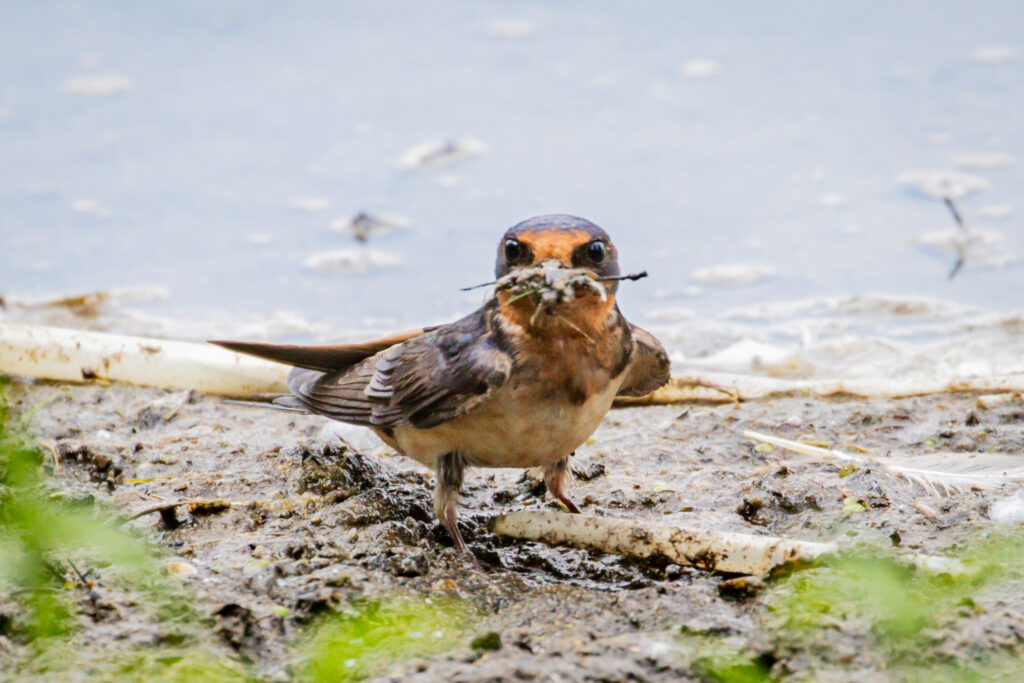
Notice how white the water behind the bird appears, but you can see a hint of blue in it. I then reduced the Whites setting in Lightroom and the picture now shows more of the blue in the water:
These techniques are not fool-proof; sometimes an image is so backlit that you really can’t obtain a usable picture from it. However in many cases by adjusting the Shadows, Contrast, and Exposure controls (and occasionally the Whites) you can improve the quality of your pic.
Go Birding. Take Pics. Share Here. Repeat.
Mike
Click Here if you would like to learn more about GreatBirdPics. Members can post their own great bird pics, create an online gallery of their works, and regularly receive emails about bird photography.


I agree with all of these points! If Photoshop is available, using the “Object Selection Tool” and a combination of “Color Range/Select and Mask” can also be very helpful. It’ll allow you to locally adjust certain areas of the photo (the background and/or the bird) for greater control.