Be sure to enter the latest Bird Photography contest on GreatBirdPics. Win $100 for the best Reflection shot. CLICK HERE for more details.
Last week I shared some images of a backlit Great Blue Heron with a fish and by adjusting a couple of Lightroom settings I was able to create a silhouetted picture. GBP member Bajadreamer emailed this in response, “… as a general rule I follow Greg Basco’s (Deep Green Photography) advice ‘Do not try to make good light out of bad light’… Bottom line for me- if the shot does not work as a silhouette or as a ‘fringe light subject’ I just do not push the shutter.”
A couple of great points are made in Basco’s quote. First, if a subject is poorly lit it’s difficult to post-process the image to look well-lit even with all the tools in Lightroom or Photoshop.
The second point refers to a “fringe light subject”. I don’t know if this phrase was coined by Basco or Bajadreamer but my assumption is that it is referring to an image in which the light outlines the shape of the bird. My next example of a backlit photograph is what I interpret as a “fringe light subject”. Below is the original photograph with no post-processing:
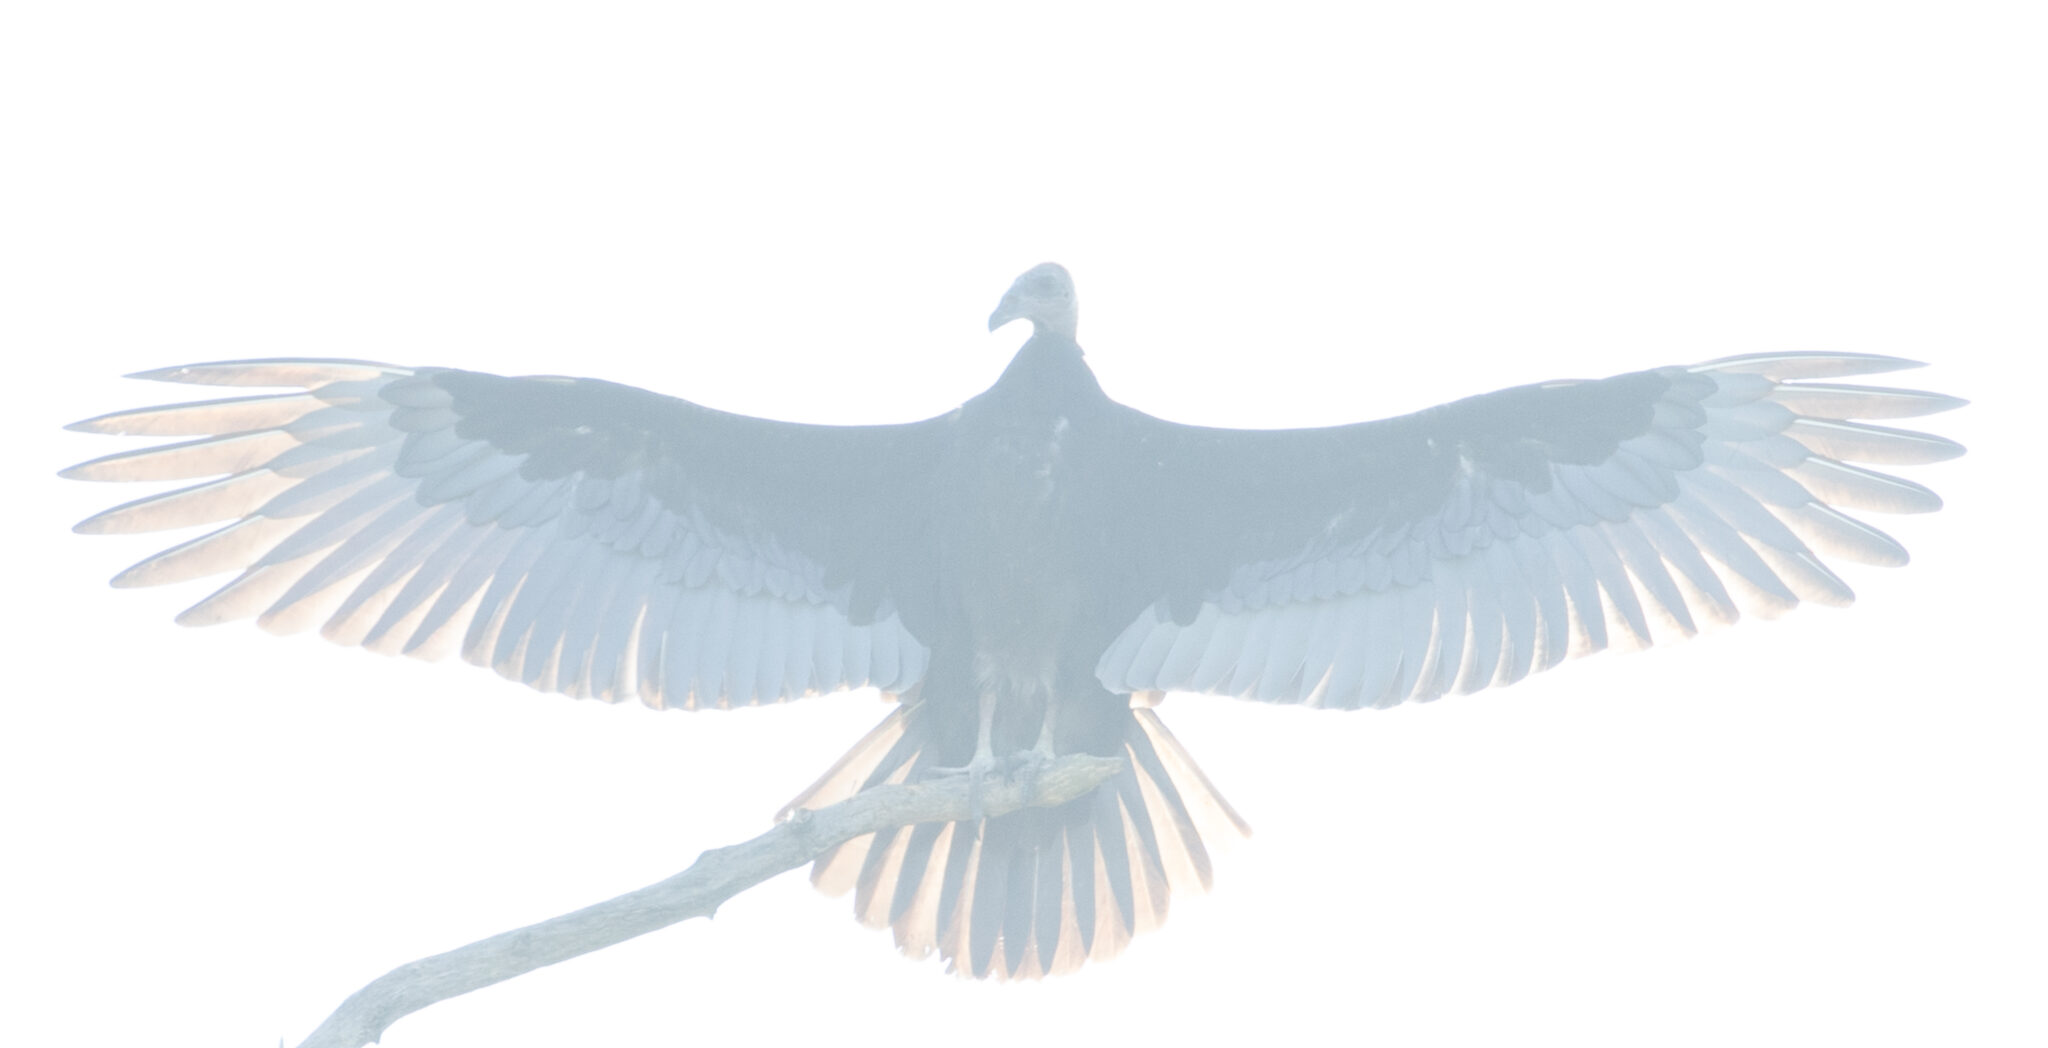
I remember the day well – we were hiking along Centennial Trail and I looked up into the sun and saw this Turkey Vulture with the light shining through its stretched out wings. I thought it would make an interesting backlit subject so I increased my camera’s Exposure Compensation to +3 to capture some detail in the bird (otherwise it would have been completely silhouetted).
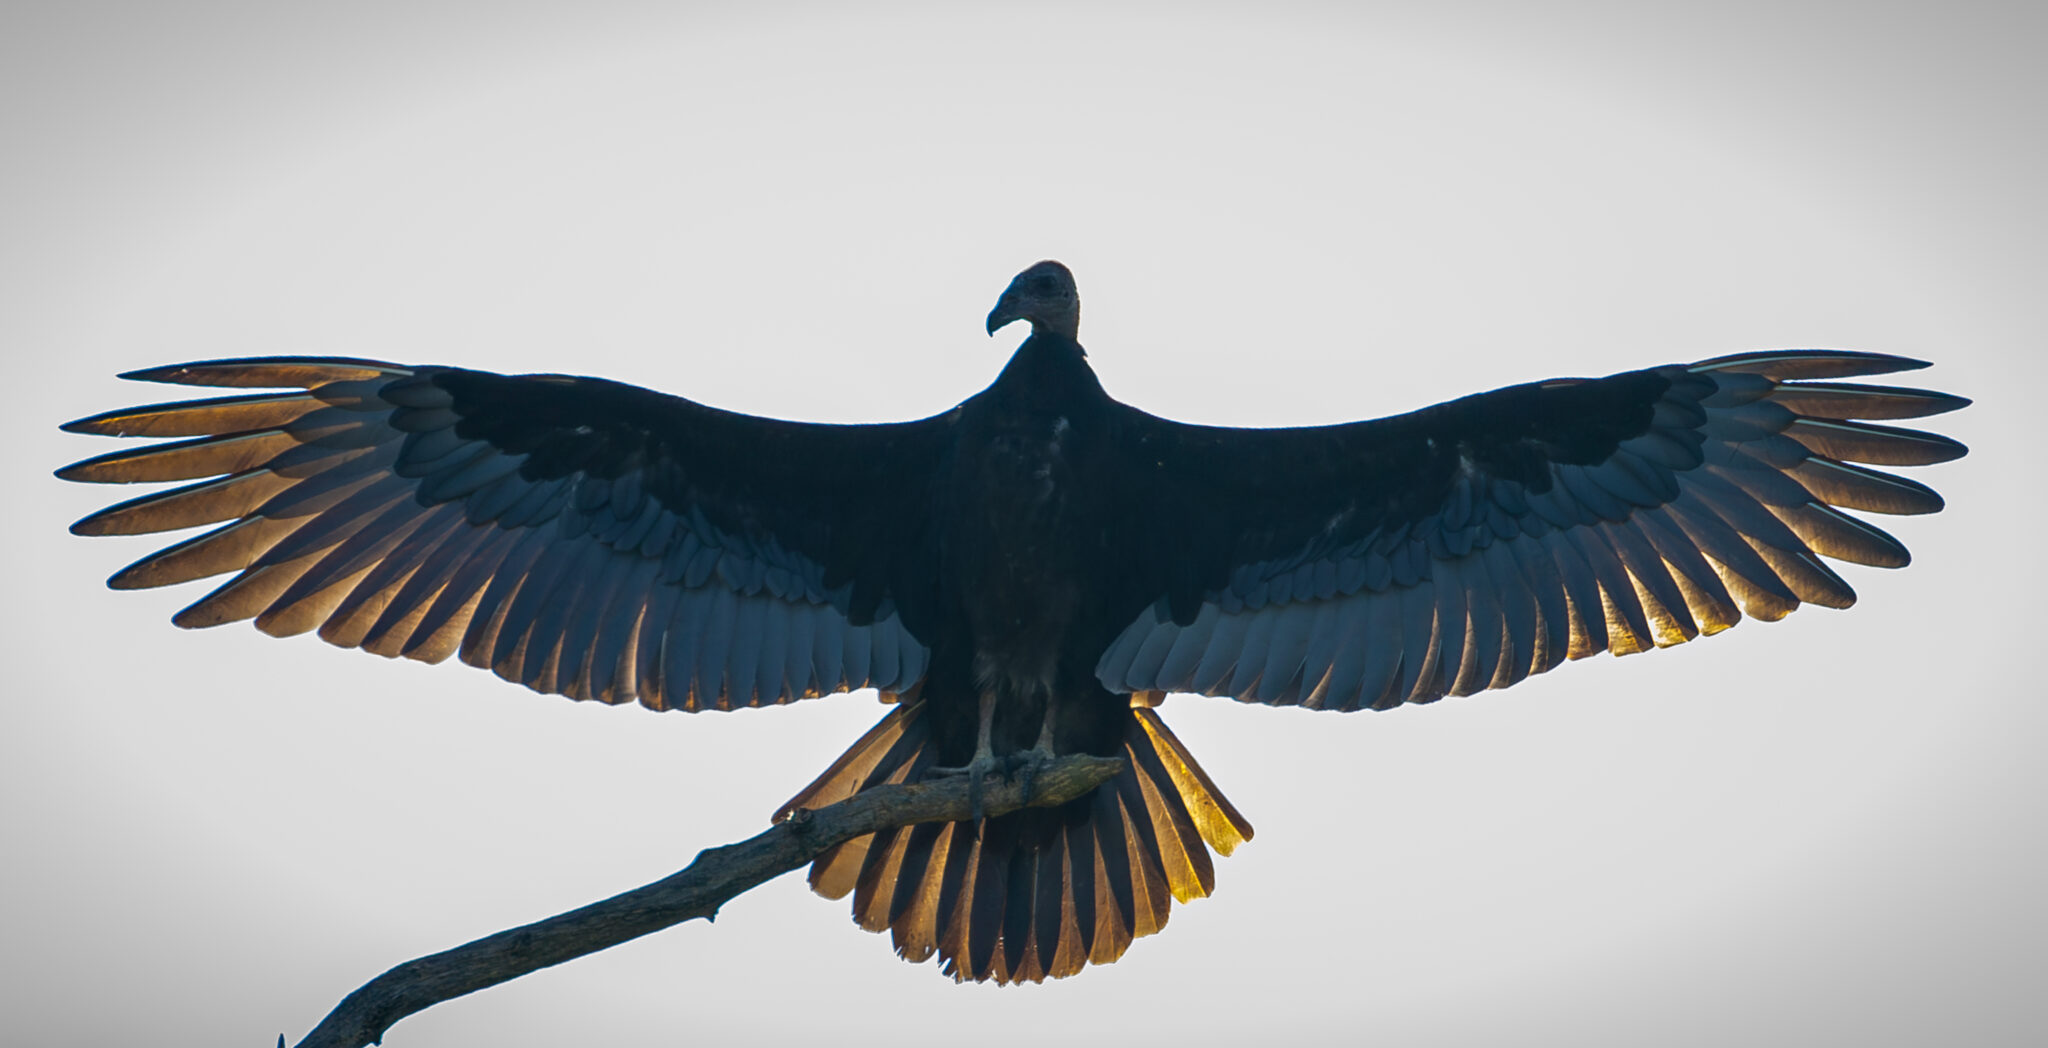
Back home I loaded the file into Lightroom and went to the Develop module. I made four light adjustments and two personal preference adjustments. The first light adjustment I made was to lower the Exposure (-2.6) so the entire image was darkened. Then I adjusted the Contrast (+34) to increase the difference between light and dark. Even after these two adjustments there was a light sheen across the bird so I decreased the Highlights slider all the way down (-100). After these three adjustments the feathers outlining the bird were still a little dark so I increased the Shadows to +53 (a positive Shadows setting decreases the light in that range).
At this point I was pretty happy with the image but I made two more adjustments to add some qualities that I like to the picture. First, I used Sharpening (+72) to increase the detail in the outstretched feathers. Then I set the Post-Crop Vignetting to -10. This setting darkens the corners of the image and I usually add some to each of my photographs to bring the viewer’s attention to the center. In this case the vignetting of the white background gives the image a haloing effect, which I like.
Below is the final version of my Turkey Vulture image and I’m happy with the outcome. I believe it is an example of the “fringe light effect” with the sun shining through the translucent feathers.
Do you have examples of subjects in which you adjusted the image to create a “fringe light effect”? Please share!
If you enjoy seeing beautiful pictures of birds from around the world and reading about them Click Here to sign up for our mailing list. Members can post their own GreatBirdPics and learn more about bird photography techniques.
Amazing transformation!